
Using Token2 Hardware Tokens for Keycloak
 Keycloak is an open-source software solution designed to provide single-sign-on access to applications and services. It allows users to authenticate once and access multiple applications without needing to re-enter their credentials.
The project was started in 2014. It has since grown into a well-established open-source project with a strong community behind it. It is used for small projects and large enterprises.
Keycloak is an open-source software solution designed to provide single-sign-on access to applications and services. It allows users to authenticate once and access multiple applications without needing to re-enter their credentials.
The project was started in 2014. It has since grown into a well-established open-source project with a strong community behind it. It is used for small projects and large enterprises.Keycloak supports 2FA authentication with the TOTP algorithm via Google Authenticator and FreeOTP apps. In this guide, we will show the procedures required to configure Token2 programmable tokens (as a replacement for the Authenticator App) for two-step verification.
Requirements:
• Access to the Keycloak Admin UI.
• A Token2 programmable token.
• An iPhone or Android device with NFC*.
[* Android and Windows versions are available for all models, but this guide will use the iPhone app as an example. iPhone apps are compatible with "-i" models only].
Step 1. Enable an MFA method
1) Log in to the Keycloak Administarion console and click on 'Create Realm'.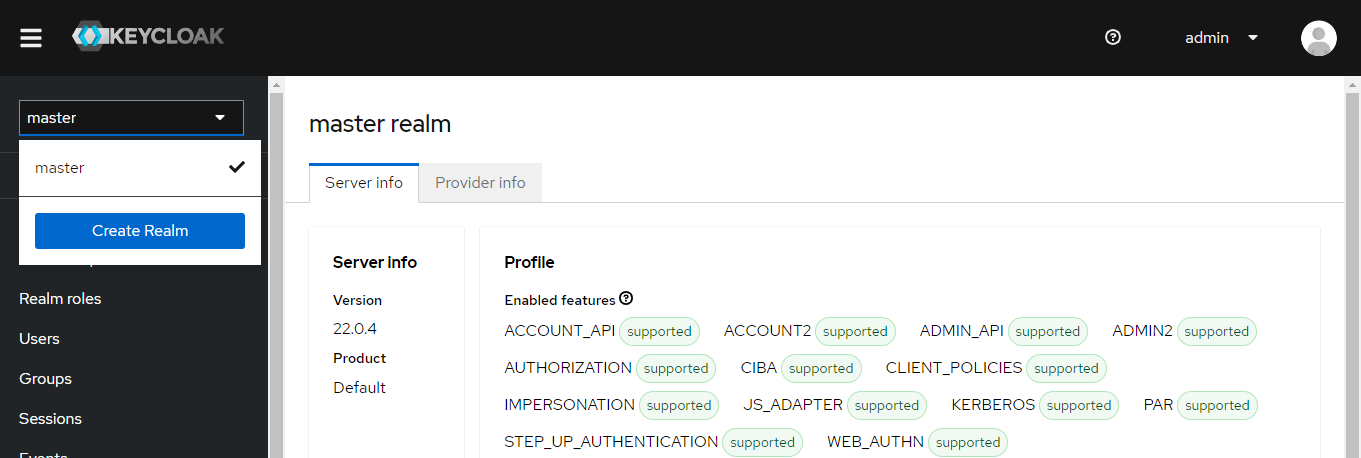
2) Give the name TOTP and click on the save button.
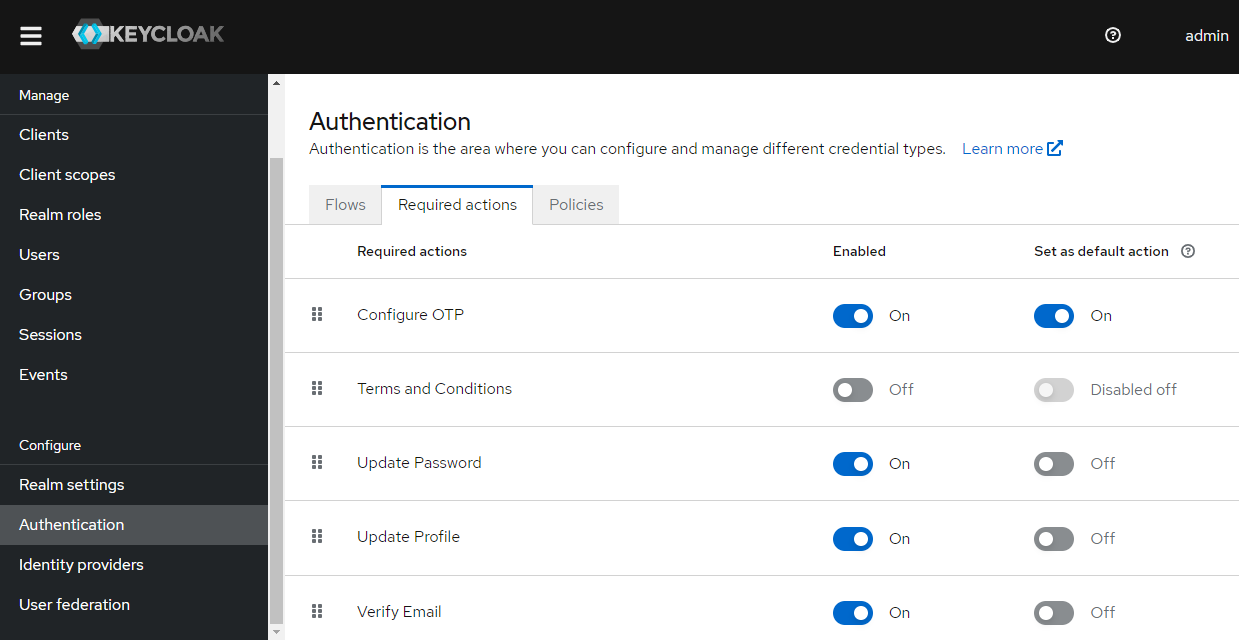
3) Then go to Authentication > Required Actions > Configure OTP. Turn on the 'Set as default action' option.
4) Check the OTP policy settings. The settings should be as below:
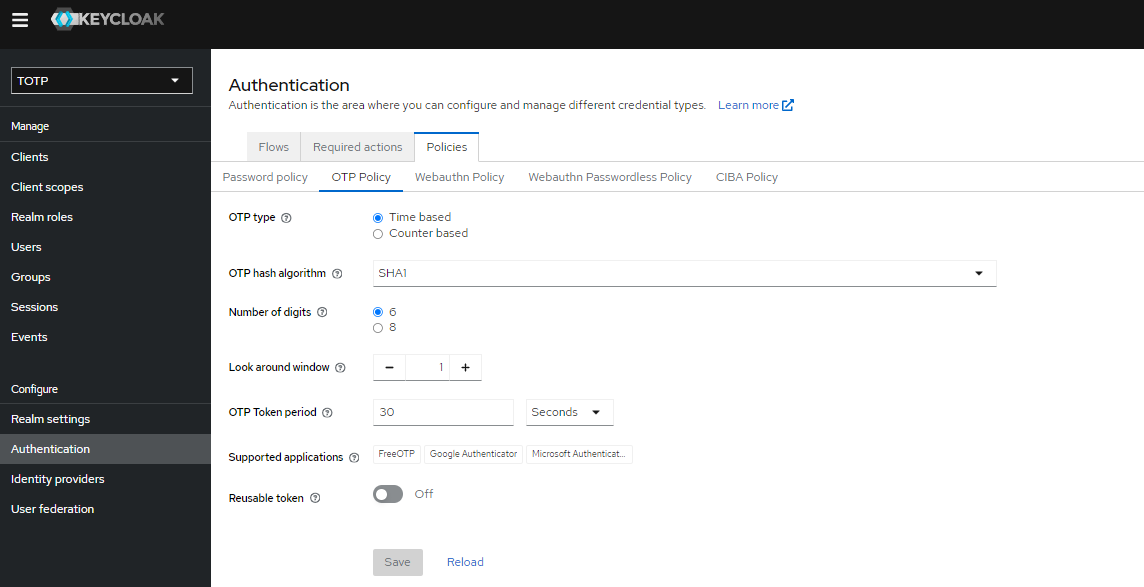
As you see, Google Authenticator is specified as one of the supported applications for the OTP policy.
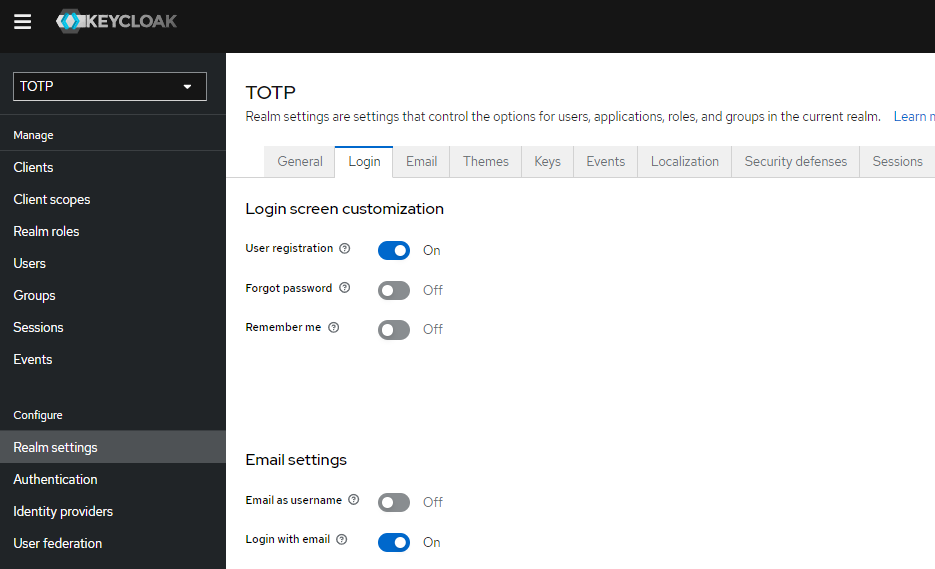
5) Go to Realm Settings > Login. Turn on the 'User registration' option to be able to register new users.
In this guide, we will use the Keycloak app (https://www.keycloak.org/app/) as an authentication client for testing functionality.
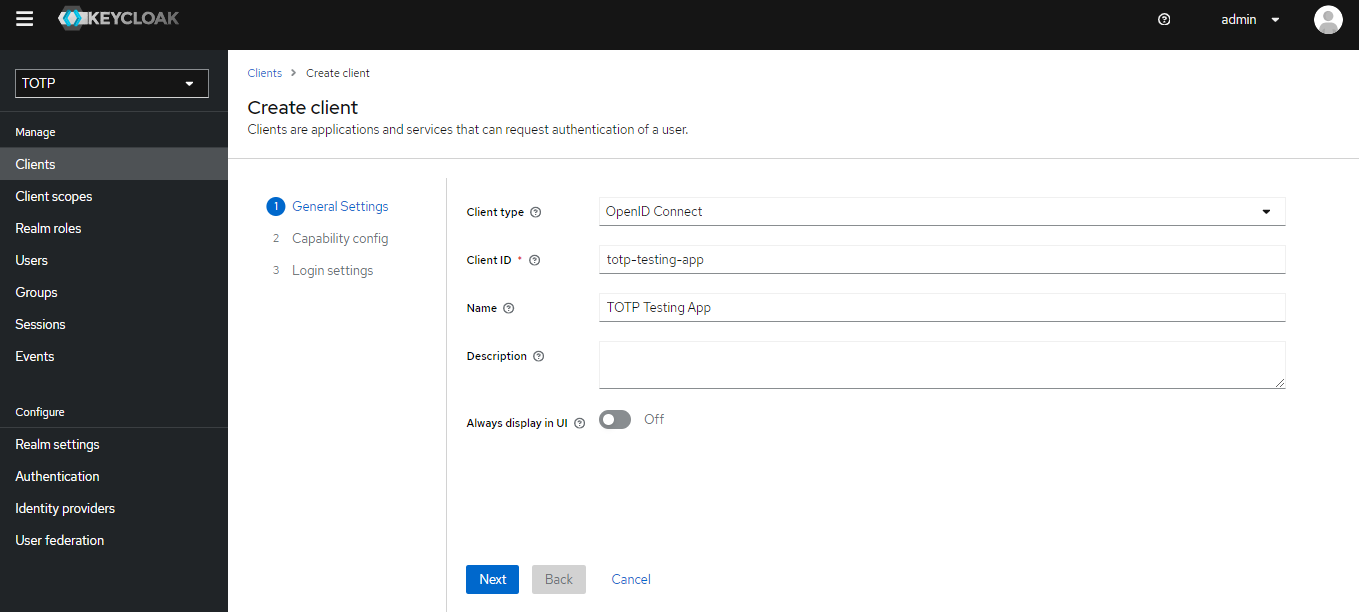
Go to Clients > Create Client. Give a client ID and name, like below. Then click 'Next'..
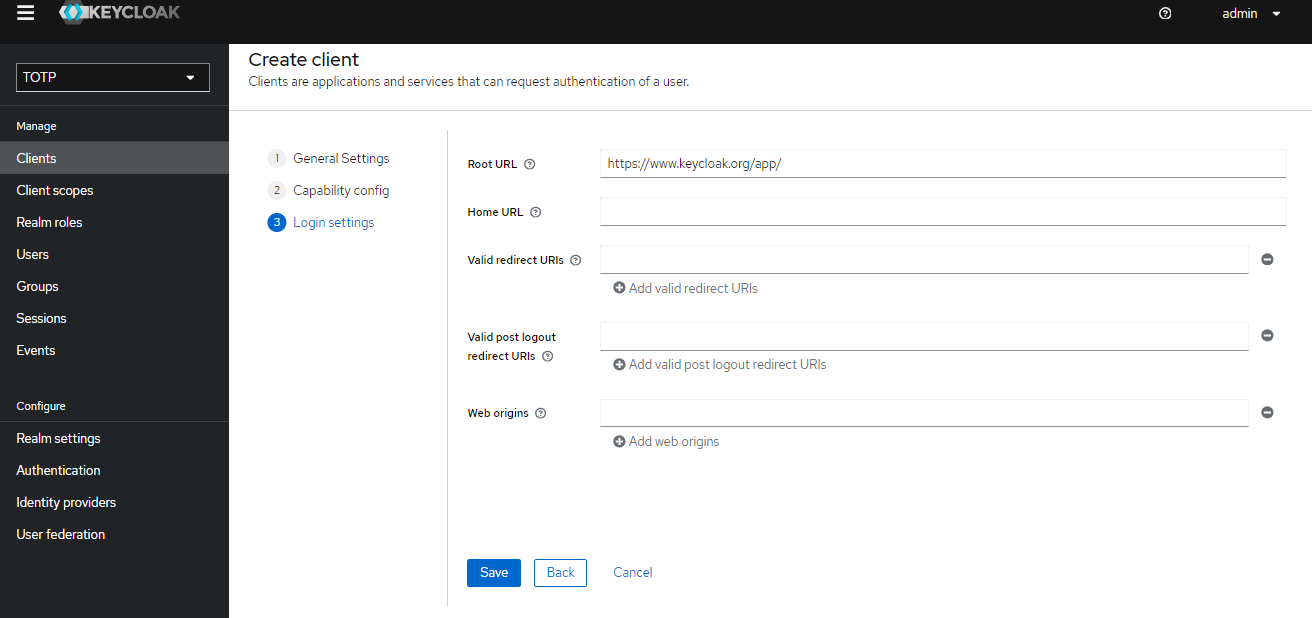
Click 'Next' again. Give the root url value as https://www.keycloak.org/app/ and click 'Save'.
Then go to the client app root page and enter the Keycloak URL, Realm name, and client ID. Click 'Save'.

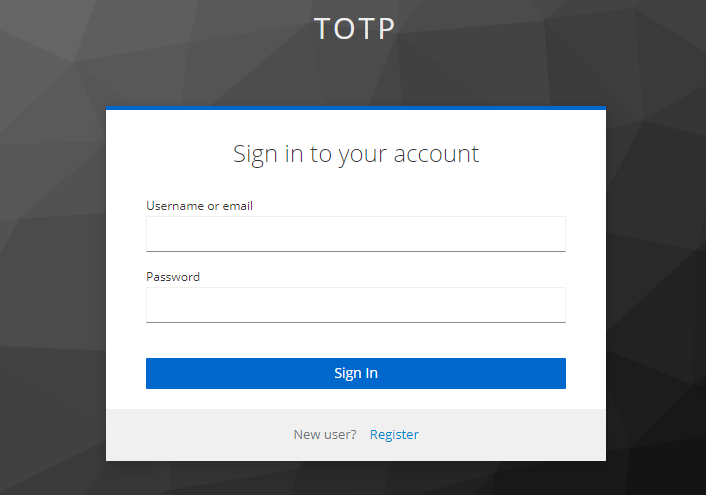
Then click 'Sign in' and you will be redirected to the provided Realm login page.
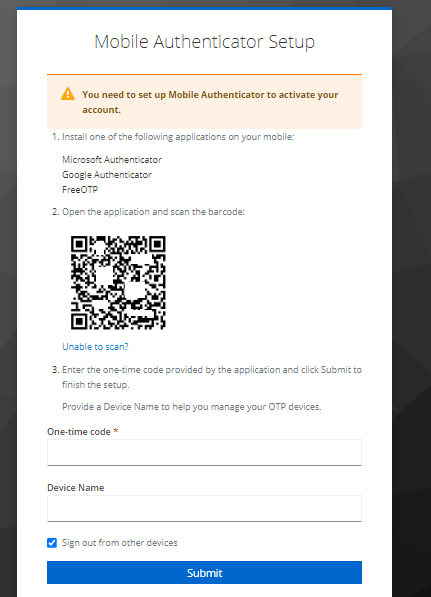
Click on the registration link. Fill in the new user details and click 'Register'. Then you will be redirected to the OTP enrollment page, which contains a QR code that you will scan using one of the provisioning tools in the next step.
Step 2. Provision the token
- Launch the NFC burner app on your Android device and hit the "QR" button

- Point the camera to the QR code shown on the account page. Upon a successful QR scan, the camera window should disappear
- Turn on the token and touch it with your phone (make sure it is overlapped by the NFC antenna) and click "Connect" on the app
- Upon successful connection, click the "Burn seed" button (the button will become active only if NFC link is established).

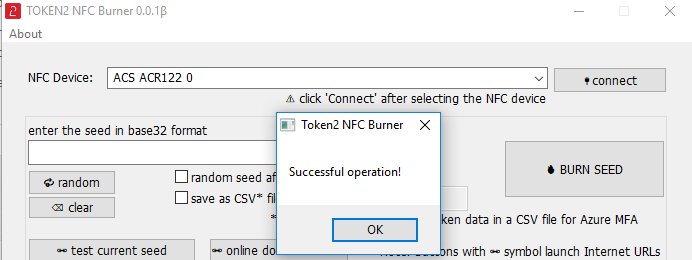
- A message box similar to the one below will be shown upon successful completion

Follow the steps below to perform setting the seed for your token using Windows App.
1. Launch the exe file, then select the NFC device from the drop-down list and click on "Connect". You should see a message box notifying about a successful operation.
2. Enter or paste the seed in base32 format, or use one of the QR scanning methods to populate this field
3. Place the token onto the NFC module and wait for its serial number to appear.
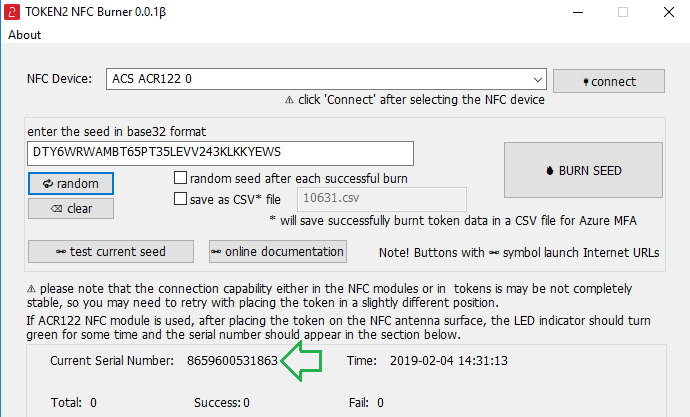
4. Click on "Burn seed" button. A log entry with the serial number and "Successful operation" text will be logged in the log window.

- Launch the NFC burner app on your iPhone device and hit the "scan QR" button
- Point the camera to the QR code shown on the account page. Upon a successful QR scan, the camera window should disappear and the seed field will be populated with the hex value of the seed. Touch the Burn button to continue.
- When an NFC prompt similar to the one below is shown, turn on the token and touch the top of your iPhone with the token.

- A message box similar to the one below will be shown upon successful completion
Please note that the procedures above are shown only as examples and are valid to single profile TOTP tokens only. The procedure for multi-profile and USB-programmable devices are similar but slightly different
Step 3. Connect using 2FA
After the token provisioning is done, turn the token off and back on. Enter the OTP generated by the hardware token and give a name for the device. Then click 'Submit'.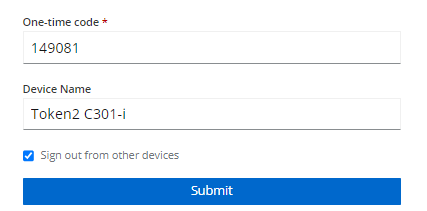
Now MFA is enabled for this user. Every time you enter a username and password, you will be asked to enter an OTP.
Subscribe to our mailing list
Want to keep up-to-date with the latest Token2 news, projects and events? Join our mailing list!