
Guide - PIV Login on MacOS
PIV-based Login on macOS
This guide explains how to configure PIV-based login on macOS using a PIV-enabled Token2 device and PIN instead of a traditional password.
Prerequisites
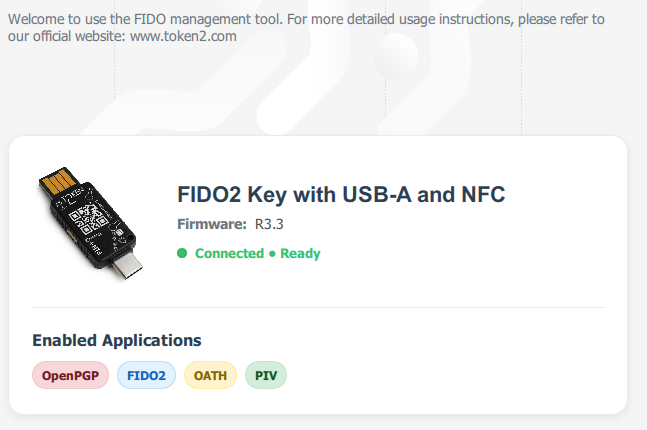
1) A Token2 PIN+ Release 3.3 device. If the device is a smart card, you will also need a compatible card reader. An NFC-enabled PIV-USB Stick can also be used with an NFC reader for added convenience.
2) Token2 Companion
3) A Mac with support for PIV-based login. According to Apple, macOS 10.13.2 (High Sierra) or later is required. This guide was created and tested using an M1 Mac Mini running macOS 26.0 Tahoe.
Part 1: Creating the Keys and Certificates
In this section, we will use the Token2 Companion application to generate the required keys directly on the PIV device.
1) Install the Token2 Companion app and launch it.
If your device does not support PIV functionality, the PIV menu at the top of the application will appear greyed out.
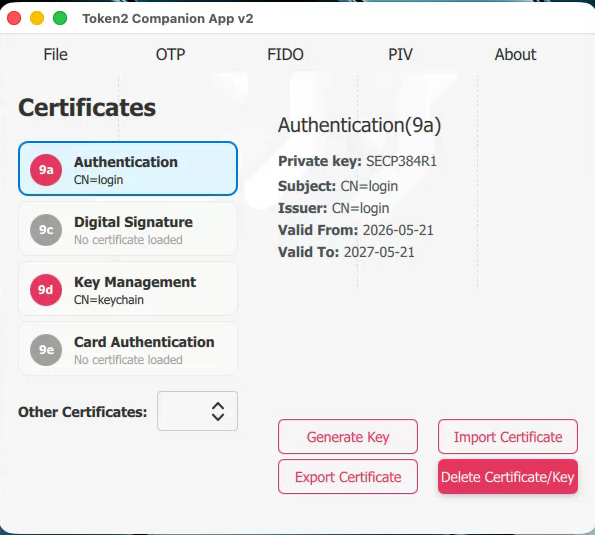
2) Navigate to PIV → Certificates to open the certificate management overview for your PIV device.
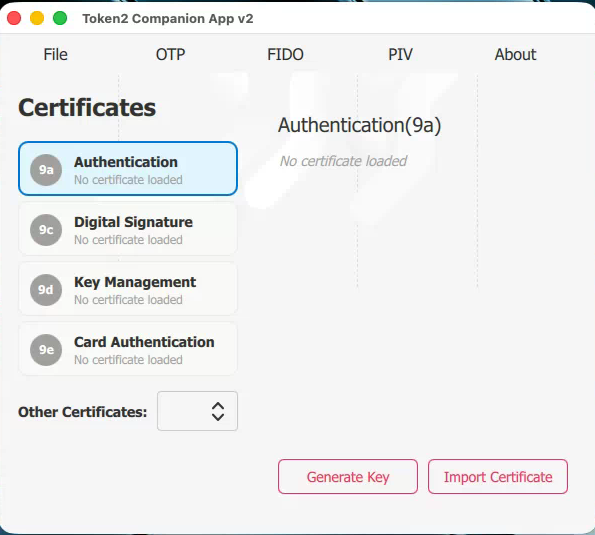
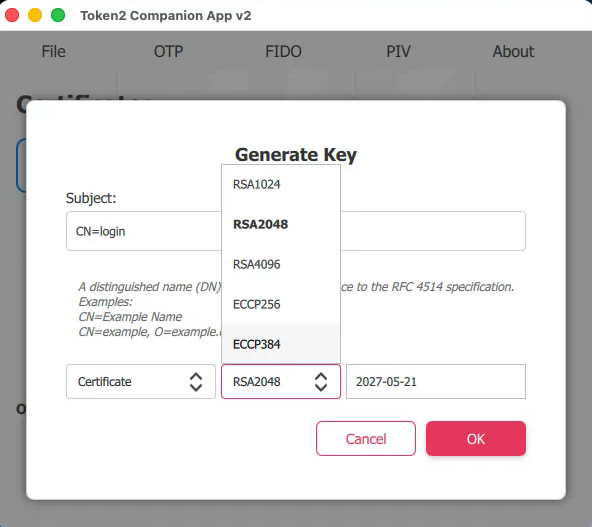
3) In the Authentication (9a) slot, generate a new certificate. The Subject field can contain any LDAP-style string. It is used only as a visual identifier for the certificate and is considered public information.
Any Key Type may be used except RSA1024, which is now considered insecure.
4) Repeat the same procedure for the Key Management (9c) slot to create a second certificate used for Apple Keychain decryption.
The result should look similar to the example below:
Part 2: Pairing the Device with Your macOS User Account
Once the keys and certificates have been added to the device, you can pair the PIV device with your macOS user account. This process authorizes the device for login and links it to your Apple Keychain so macOS can decrypt protected data without requiring your account password.
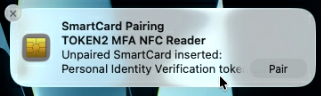
1) Reconnect your PIV device to your Mac.
2) If everything is configured correctly, macOS should display a notification offering to pair your smart card. Hover over the notification and click the Pair button.
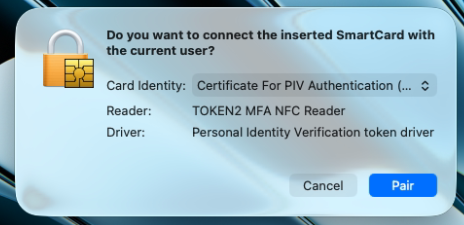
3) A confirmation dialog will appear asking which identity you want to use (normally there will only be one available) and which reader to use. Even USB-connected PIV devices are detected by macOS as smart cards inserted into a reader.
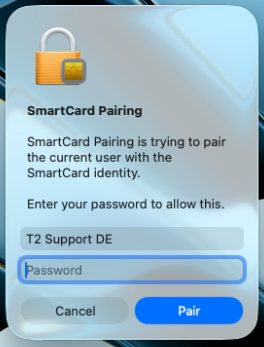
4) You will then be asked to confirm the action using your macOS account password.
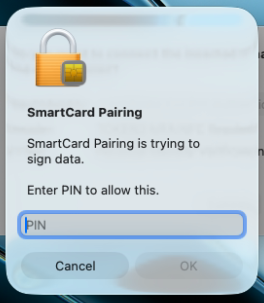
5) Next, enter your smart card PIN to verify that the PIV device is correctly configured and operational.
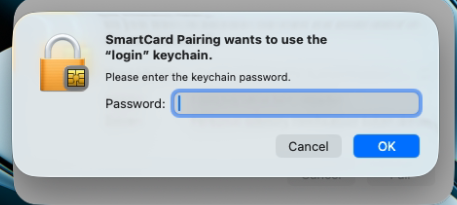
6) Finally, enter your Apple Keychain password so macOS can configure Keychain decryption using the smart card.
After locking your screen, you should now see a PIN prompt instead of the standard password prompt.

Part 3: Appendix / Notes
macOS technically allows multiple PIV devices to be paired with the same user account.
By creating separate identities for each device, they can be revoked or unpaired individually if required.
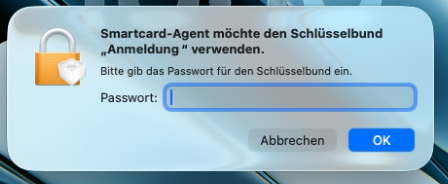
However, when multiple different PIV devices are used, the Apple Keychain will only unlock automatically with the most recently paired or used device.
If Keychain decryption fails because of switching PIV certificates or using an incorrect Key Type for the 9c certificate, macOS will display an additional prompt requesting the Keychain password during login:
Based on current testing, the only reliable way to avoid additional Keychain password prompts when using multiple devices is to provision all devices with identical keys and certificates in their corresponding slots. For example, all encryption certificates must match, and all authentication certificates must also match. However, the authentication certificate itself does not need to be identical to the encryption certificate. These certificates and keys must be generated externally and then imported onto each device.
Subscribe to our mailing list
Want to keep up-to-date with the latest Token2 news, projects and events? Join our mailing list!